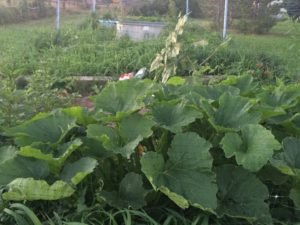
In Colorado, those that attempt to grow their own food have a true challenge. As we write this, it’s Memorial Day Weekend and we still have our heat on inside! We had snow last weekend and now that it’s “warmer” we know that we’ll soon be dealing with hail. Between the weather, the shorter growing seasons, and the natural dry-ness of our area, gardening requires a little extra work. But, it’s worth it!
We’re no experts, but we have had a few years under our belts and have learned a thing or two. Here are our top ten tips for gardening success!
- Start thinking about your seeds in late February or early March. Yes, this feels a little early, but if you’re trying to grow fruiting plants like tomatoes and peppers, you must start your plants inside around now to have large enough plants for harvest by the end of the summer.
- Cardboard rolls like for toilet paper and paper towels are not ideal for planting seedlings in. We tried, and while they worked in a lot of cases, they also were a great place for mold to get a foothold too. I don’t know about you, but I don’t love the idea of mold growing in my house…even if it’s just on something that will grow in the ground eventually. This was an idea attempted because of Pinterest, but it didn’t really work!
- Cardboard rolls can instead be cut into small 1″ wide circles that can help “hold up” plants that need some extra support. When your seedlings are small, this works great and you can always cut the cardboard off when you don’t need it anymore.
- Pint-size yogurt containers work great for starter plants. We like to plant seedlings in containers that they can grow into. The less we have to move them, the less trauma they face.
- Milk jugs are your friend! Cut the bottom inch or two off of a plastic milk carton and take off the cap. You have an instant miniature green house that you can place over your seedlings when you plant them in the ground. This helps protect the new plant from temperature swings, wind, and other pests.
- Milk jugs make great watering cans. This was a Pinterest Win! It’s simple: just poke about ten holes through the cap of a plastic milk jug with a sewing needle. When you screw it on, you have an instant watering can that doesn’t cost you a penny to make, but is functional AND brings new life to the plastic jug.
- Cardboard can be a huge help! After you plant your seedlings or seeds in the ground, you’ll have a either rows, or aisles between plants, or sections between your different plants. Any of this open space can be covered in cardboard. We like to use plain, old brown corrugated cardboard since it’s thick and doesn’t have a lot of dyes that could leach into the ground. Placing these down helps prevent weeds from popping up. As your plants get more established (and you know what’s a plant vs. a week), you can add more cardboard weed barrier if you want to make life easier.
- Rotate your crops. Always rotate your crops so that you’re not planting the same thing in the same place every time.
- Deer netting make a great “fence” around your garden. We made a simple fence using t-posts, deer netting, and twisty ties (from veggies throughout the year). I love deer netting because I can buy the ones that are six feet wide. This keeps the bigger critters out of my garden, including my two dogs!
- Don’t stress! You may not do your garden ‘just right’ the first time. You’ll learn from the first year, and the second, and the third, and really every year. It took us a few years to get tomatoes to work for us. Also, while I would LOVE my garden to look like it came out of a spread in Better Homes and Gardens, the truth is that my garden looks pretty crazy by mid-summer. I just don’t have time to weed everything. That’s okay. Give yourself grace as you go through this process.